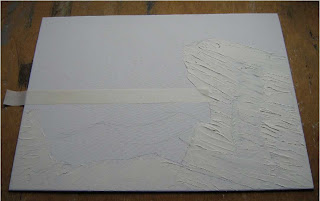
I had a container of texture paste that's pretty old and starting to dry up a bit at the top. Rather than waste it I decided to use some for the foreground stone in a seascape.
I took a few photos of some of the stages so you could see how the final painting was achieved.
This seascape is painted on a canvas panel. I like canvas panels as they can be trimmed if you decide that a section of a painting isn’t working.

First I started with a rough sketch of where the stones and main wave would be. Using a palette knife the texture paste was applied. The local stone here has very definite layers in its structure. So it is fairly straight forward to apply the paste to give this effect.
*
*
Once the paste was dry a strip of masking tape was positioned for the horizon. In a seascape it is important that this is level or the water looks like it could fall out of the picture. (Not what you’re trying for!)
*
*
This area was painted with black acrylic and left to dry. The stone area can be painted quite roughly, with thin and thicker areas of paint to help with the stone shading.
*
*
 When the picture was painted in I didn’t like the section on the right so I added more texture paste to add some grassy texture to the top and some to improve the stone shape lower down. Once it was dry I carried on with the acrylic paints.
Adding white to the neutral colours gives good stone-like colours.
*
*


