The lower image is my completed painting.
Using acrylic paints and mediums
In this second part I'm trying a mix of two painting techniques.
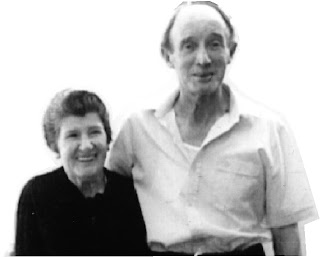
I'm still using the same photo of my parents that I used in last month's posting, but this time I printed it onto a thinner photographic paper. The photo paper is a matte General Use one of 120gsm, for using with inkjet printers. As before, if you want to try this you need to make sure that your printer ink is not affected by water once dry. My printer uses pigmented inks that are waterproof when dry.
This time I started with the same photo and cropped out the part I wanted to use. I didn't like the background in the photo so I cut it off. Last time I painted it out but this time I want to try to use the paint as thin washes.
I then printed out the cropped photo in black and white. I'll add the colour using the paints.
Seal the Back of the Paper – First Technique
As this is fairly thin paper I sealed the back of my (cropped) print with Acrylic Gesso. Once dry I'm hoping that it will stop the paper from buckling too much when I apply the washes. This technique is explained in the blog posting of the 20 January 2009.
I left this overnight to make sure that it was fully dry.
Use washes of colour
I used washes of colour to paint the print. This makes painting the faces a lot easier as the lines and shading are already in place. No worries about getting the faces looking good either. :-)
In this example I still wanted to change the black of my mother's top to something lighter and this had to be painted with thicker paints. However the rest of the painting was put in using thin washes of colour.
I used a light random wash for the background as the portraits are the main focus of the picture.
The Result
I didn't spend too long on this painting. The original print was very low resolution so the printed image is not too clear, which I really like. So when I added the colour I did not want to be too precise. I think that it makes the final result look more like a painting than a coloured photo.
Using the gesso on the back helped to stop the paper from stretching too much but it still buckled a little bit when wet, however on the whole it was fine.
I'm fairly pleased with the result.
***
This example used a 'budget' weight of photographic paper compared to the one in last month's example. If I hadn't put the acrylic gesso on the back of it the paper would have stretched too much to get a good result. The paint would have puddle in the lower areas and looked terrible.
I prefer the painting from last month as it looks like a 'proper' painted portrait. However this example using washes gives a very good likeness and was painted in a fraction of the time too.
It really depends on the look you want and the photo you are using.
.

No comments:
Post a Comment